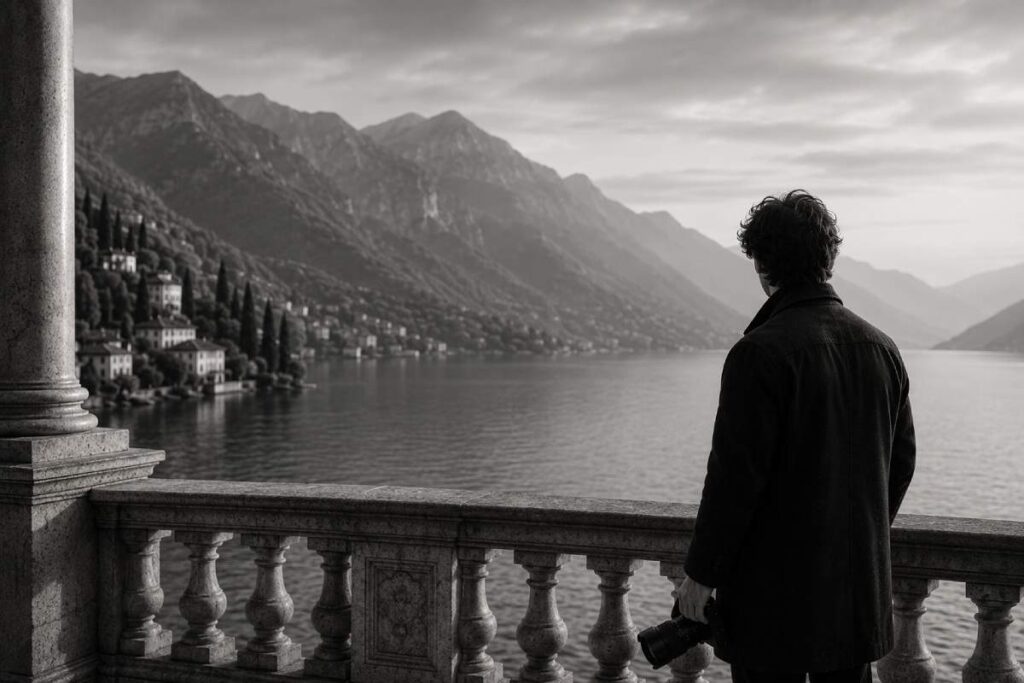
Before buying another camera or lens, learn to read the light already in front of you. This practical Image Studio Academy guide explains direction, softness, contrast, colour, window light, open shade, midday sun, golden hour and the exercises that build real lighting judgement.
← Back to Editorial
← Back to Editorial
Mastering Natural Light Before Investing in Expensive Gear
August 31, 2026
ACADEMY
A practical guide to reading direction, softness, contrast, colour and exposure before asking a new camera or lens to solve the problem.
IMAGE STUDIO EDITORIAL
Photography education • Natural light • Visual judgement • Practical exercises
|
DIRECT ANSWER Natural light photography improves fastest when you stop treating daylight as a single condition. Learn to recognise where the light comes from, how large and soft it appears, how much contrast it creates, what colour it carries and how it changes across the scene. Better gear expands capability. It does not replace the ability to recognise useful light. |
A photographer can own a remarkable camera and still make flat photographs in a beautiful room. Another photographer can work with an older body beside an ordinary window and create a frame that feels dimensional, calm and intentional. The difference is often not resolution, autofocus or price. It is the ability to read light before making technical decisions.
This is not an argument against equipment. Cameras, lenses, stabilisation, dynamic range and autofocus solve real problems. But equipment becomes most valuable after the photographer can describe the problem it needs to solve. If the subject is badly positioned relative to the light, a more expensive sensor records the same weak decision with greater technical quality.
This article continues the foundation established in Learning to See Before Learning to Shoot. Once observation becomes conscious, light is the next language to master.
|
KEY INSIGHT Do not ask first, “What settings should I use?” Ask, “What is the light doing to the subject?” Settings are the translation of that answer. |
Natural Light Is Not One Kind of Light
Natural light simply means light that originates from the sun and sky. It can arrive as hard direct sun, broad skylight, reflected light from a pale building, diffused window light, warm low-angle sunset, cool open shade or a complicated mixture of several of these at once. The source may be natural while the visual result changes radically.
That is why “I only shoot natural light” says very little about how a photograph will look. What matters is the character of the light at the subject: direction, apparent size, contrast, intensity, colour and the surfaces that modify it on the way.
|
Condition |
What is happening |
Typical visual effect |
|
Direct midday sun |
Small apparent source, high angle, little diffusion |
Crisp shadows, high contrast, visible texture, strong graphic structure |
|
Large window |
Directional daylight entering through a broad opening |
Soft-to-moderate shadows, controlled falloff, dimensional faces |
|
Open shade |
Direct sun blocked; subject lit mostly by sky and reflections |
Lower contrast, often cooler colour, quality depends heavily on surroundings |
|
Overcast sky |
Cloud layer spreads illumination across a very large area |
Soft transitions, low contrast, sometimes reduced shape |
|
Golden hour |
Low solar angle, longer atmospheric path, directional warm light |
Longer shadows, warmer colour, strong separation when used deliberately |
|
Reflected daylight |
Sun or sky bounced from walls, pavement, water or interiors |
Can fill shadows beautifully or contaminate skin with unwanted colour |
Natural Light, By the Numbers
These figures are not exposure recipes. They show why daylight should be treated as a changing system rather than a fixed “look.”
|
Number |
What it represents |
Why it matters to a photographer |
|
622 |
Daylight spectra in a widely cited dataset measured across the UK, US and Canada |
Natural daylight varies, but its spectral changes follow recognisable patterns rather than random colour behaviour. |
|
2,600 |
Natural daylight measurements reported from Southern Spain in later colour-constancy research |
The familiar yellow–white–blue progression of daylight appears consistently across large real-world samples. |
|
4 |
Illumination colour temperatures tested in one controlled daylight-perception study: 13,000 K, 6,500 K, 4,160 K and 2,000 K |
Our perception adapts across a very wide range of daylight-like colour conditions. Cameras do not adapt in exactly the same way. |
|
±6° |
Approximate solar elevation range often associated with the photographic “golden hour” around the horizon |
Golden hour is a lighting condition, not a guaranteed sixty-minute block. Season, latitude, weather and terrain change its usable duration. |
|
GOOD TO KNOW Your eyes compensate for changing illumination remarkably well. A camera can record colour casts and contrast differences that your visual system has already started to “normalise.” This is one reason photographers must learn to inspect light deliberately rather than trust familiarity. |
The Five Characteristics of Natural Light
Before moving the subject or touching exposure settings, describe the light through five characteristics. This turns a vague impression into a repeatable decision process.
|
Characteristic |
Question to ask |
What changes in the photograph |
|
1. Direction |
Where is the light coming from? |
Shape, shadow placement, facial structure, texture and separation |
|
2. Quality |
How hard or soft are the shadow edges? |
Contrast, skin texture, drama and transitions between light and shade |
|
3. Intensity |
How bright is the subject relative to the background? |
Exposure choices, highlight protection, noise and motion flexibility |
|
4. Colour |
What colour is the light, and what surfaces are reflecting into it? |
Skin tone, mood, colour separation and white-balance decisions |
|
5. Relationship |
Where are the subject, light source, background and camera relative to one another? |
The final visual result—often more than any single camera setting |
1. Direction: Learn to Read the Shadow First
Light direction becomes easier to understand when you stop staring at the bright side of the subject and study the shadow. The shadow tells you where the source is, how high it is, whether the light is wrapping around the face and which surfaces are receiving or losing detail.
Front light reduces visible shadow and can feel clean, open and direct. Side light increases modelling and texture. Backlight can separate a subject from the environment and make atmosphere visible, but it requires careful exposure. Top light can create deep eye sockets and unflattering facial shadows, yet it can also become highly graphic when the intention suits architecture, fashion or documentary work.
|
FIELD NOTE When a portrait is not working, move the subject or camera before changing lenses. Thirty centimetres can alter the background, the reflection on skin and the angle of the light more than an expensive upgrade. |
2. Quality: Hard Light Is Not Bad Light
Hard light produces crisp shadow edges and strong local contrast. Soft light produces broader transitions. Neither is automatically better. The question is whether the quality supports the subject and the visual intention.
Direct sun can exaggerate texture, carve architecture and create dramatic patterns. A large window can soften a face while keeping enough direction to preserve shape. Overcast light can be flattering but sometimes becomes so even that the subject loses separation from the background. The skill is recognising the behaviour, not memorising a preference.
|
Hard light can be useful when… |
Soft light can be useful when… |
|
You want graphic shape, defined shadows or visible texture. |
You want gradual skin transitions and more forgiving portrait contrast. |
|
The composition depends on architecture, geometry or strong colour blocks. |
The subject needs to move through a wider area without dramatic exposure shifts. |
|
You can position the subject precisely relative to the sun. |
You need a calmer, quieter or more editorial emotional tone. |
|
The shadows are part of the design rather than a problem to remove. |
You still preserve direction instead of flattening every surface equally. |
3. Intensity and Contrast: Bright Is Not the Same as Good
A scene can contain plenty of light and still be difficult to photograph. The challenge is often contrast: a face in shade against a sunlit lake, a dark interior beside a bright window, or a white dress under direct sun against deep foliage. In those situations the important decision is not “Is there enough light?” but “Which part of the tonal range must survive?”
Expose for the part of the frame that carries meaning. In a backlit portrait, highlight protection may matter more than making every shadow bright. In an interior, the outside view may be part of the story and worth preserving. In documentary work, a moment may matter more than technically perfect highlight detail. The histogram and highlight warnings are tools for judgement, not replacements for it.
4. Colour: The Light Is Not the Only Colour Source
Daylight changes colour throughout the day, but the environment also changes the light. A green lawn can bounce colour into skin. A terracotta wall can warm one side of a face. A white façade can become an enormous natural reflector. Blue sky entering a shaded doorway can make the subject cooler than the sunlit background.
This matters because photographers often blame white balance for a problem created by mixed illumination. White balance can shift the overall rendering, but it cannot perfectly remove two different colour casts hitting different sides of a subject. Position is frequently the cleaner solution.
|
THE DETAIL Look behind the light. Walls, floors, trees, water, curtains and buildings can become secondary light sources. Natural-light photography is often environmental lighting design without equipment. |
5. Relationship: Light Changes When You Move
The same window can create four different portraits without changing the camera. Turn the subject toward it and the face becomes open. Rotate the subject forty-five degrees and the light begins to model the cheekbones. Move to ninety degrees and the portrait becomes more dramatic. Place the window behind the subject and the image becomes about silhouette, separation, flare or reflected fill.
This is why natural-light mastery is physical. You learn by moving. The photographer who remains rooted in one position often treats exposure as the only variable. The photographer who understands light treats the entire geometry of the scene as adjustable.
Window Light: The Best Free Studio for Learning
A window teaches almost every foundational lighting principle at once: direction, source size, distance, falloff, reflection, background control and colour contamination. It is also repeatable enough that you can study the effect instead of chasing a moment.
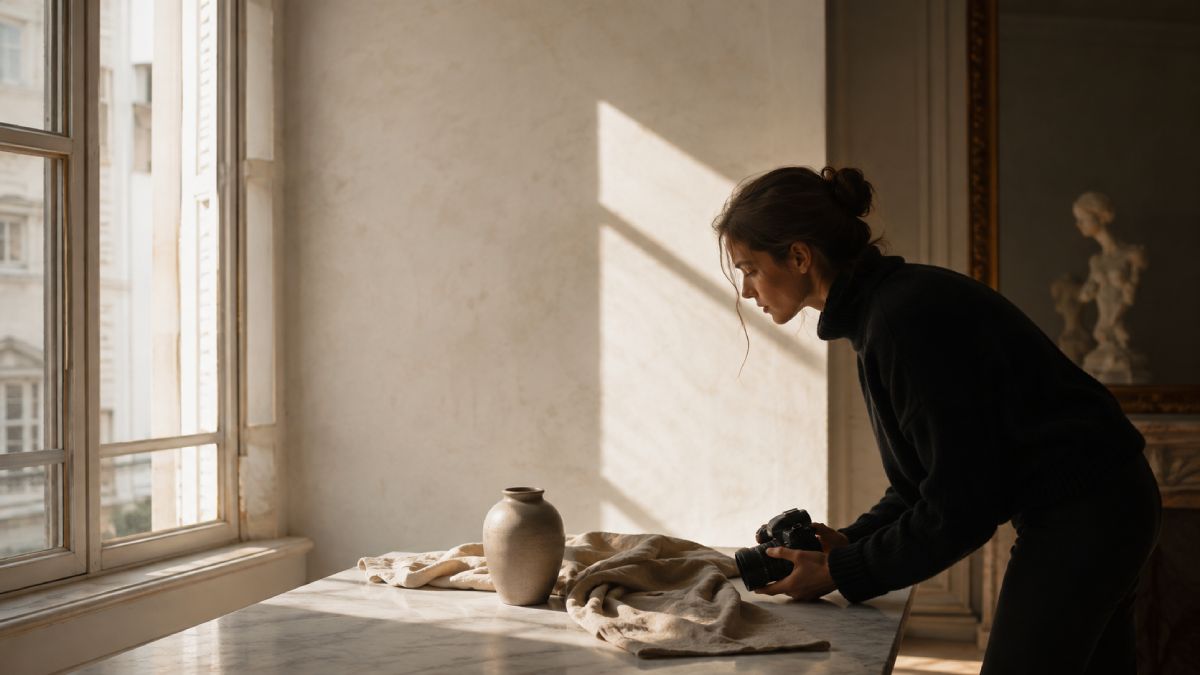
Start with one person and one large window. Turn off unnecessary artificial lights so you are not mixing sources. Place the subject near—but not necessarily against—the window. Study the transition from the lit side of the face to the shadow side. Then move the subject deeper into the room and notice how the ratio between subject and background changes.
A Simple Window-Light Sequence
- Face the subject toward the window. Observe how evenly the face is lit and what happens to the eyes.
- Rotate the subject about 45 degrees. Watch the face gain shape while both eyes remain readable.
- Rotate to roughly 90 degrees. Notice how shadow becomes a design element instead of a technical problem.
- Place the window behind the subject. Decide whether you want silhouette, exposed skin with bright background, or a reflective surface to return light into the face.
- Move the subject farther from the window. Notice how the window appears smaller relative to the subject and how the light level and falloff change.
- Move yourself instead of the subject. Watch how background brightness and reflections change even when the light on the subject stays similar.
|
SAVE THIS Do not memorise one “perfect” window position. Learn what each position does. Mastery is the ability to choose the result rather than repeat a recipe. |
Open Shade: Softness Is Not Enough
Open shade is popular because it removes direct sun from the subject, but not all shade is equal. The subject is still illuminated by whatever parts of the sky and environment remain visible. Stand beneath a dense tree and the face may receive green reflected light. Stand deep inside a doorway and the eyes may become dark because the visible sky is too small. Stand beside a neutral pale wall and that wall may produce beautiful fill.
When evaluating shade, look outward from the subject. What can the subject “see”? Blue sky? Green foliage? Bright pavement? A white building? That environment is shaping the illumination.
|
Shade condition |
Likely issue |
Better response |
|
Under green trees |
Green reflections and patchy light |
Move toward the edge of shade; use neutral surroundings or change angle. |
|
Deep doorway |
Dark eyes, rapid falloff |
Bring the subject closer to the opening or rotate toward visible sky. |
|
Beside white stone |
Strong natural fill |
Use the surface intentionally; watch for reduced facial contrast. |
|
Covered terrace facing open sky |
Soft directional light |
Excellent portrait condition when the background is controlled. |
|
Shade with bright sunlit background |
Large subject/background exposure difference |
Change angle, bring subject toward brighter edge, or decide deliberately which tonal region matters. |
Backlight: Protect the Atmosphere Without Losing the Subject
Backlight is often associated with romantic portraits because it can illuminate hair, haze, fabric and airborne particles while keeping facial light softer. But the technique becomes weak when the photographer simply points into the sun and hopes flare will create emotion.
First decide what the background is doing. If the sun is directly in frame, small movements can change flare dramatically. If the sun is just outside the frame, the image may retain contrast while still producing rim light. If the subject is too dark, look for natural fill from the ground, a pale wall or open sky before reaching for equipment.
Exposure is a creative choice. A bright, airy backlit portrait may tolerate lifted shadows. A silhouette depends on withholding detail. A documentary moment may be allowed to remain darker if the light itself is part of the atmosphere. There is no universal “correct” backlight exposure independent of intent.
Midday Light: Stop Treating Noon as a Failure
Midday sun is difficult because it is high, hard and usually creates strong contrast. That does not make it unusable. It makes it less forgiving. The useful skill is learning how to modify the situation with position and environment rather than waiting for sunset to rescue every shoot.
- Use architecture: arcades, doorways, balconies and covered terraces can turn overhead sun into directional shade.
- Use walls as reflectors: pale stone and plaster can return light into faces without adding equipment.
- Use hard light intentionally: let shadows become graphic elements instead of trying to hide them.
- Watch the ground: bright paving can fill faces; grass can add green contamination.
- Change the subject angle: small rotations can keep direct sun off eyes while preserving shape.
- Choose the background deliberately: a dark background can make a sunlit subject feel controlled; a bright background can overwhelm a shaded face.
|
KEY INSIGHT The goal is not to make midday look like golden hour. It is to understand what midday does well and design the frame around those characteristics. |
Golden Hour: Beautiful Light Still Requires Decisions
Golden hour is loved because the sun is lower, shadows lengthen and the light often becomes warmer. But the label can create lazy photography. A low sun behind the wrong background is still the wrong background. Warm light hitting a subject from an unhelpful angle can still flatten or distort the face. And mountains, buildings or cloud can remove direct sun long before an app says “sunset.”
Treat golden hour as a changing sequence rather than a single look. Early in the period the sun may still be bright enough for strong directional portraits. Closer to the horizon, backlight becomes softer and colour changes faster. After the sun disappears, the sky can become the dominant source and the emotional character of the scene changes again.
Overcast Light: Soft Can Become Flat
Cloud can turn the sky into a giant diffused source. That usually reduces harsh facial shadows and gives photographers more freedom to position subjects. The risk is assuming that softness automatically creates shape.
Even on an overcast day, direction still exists. Look for where the sky is brightest, where buildings block part of the sky, and where the background becomes darker than the subject. Place the subject near a doorway, beneath an overhang, beside a wall or at the edge of a covered area and the light can become much more dimensional than in the middle of an open field.
Exposure: Learn What the Meter Cannot Decide
A meter can estimate brightness. It cannot decide which highlight is emotionally important, whether a shadow should remain dark, or whether motion matters more than noise. These are photographic decisions.
|
Technical control |
What it changes |
Natural-light question |
|
Shutter speed |
Motion rendering and exposure |
Must movement be frozen, suggested or deliberately blurred? |
|
Aperture |
Depth of field and exposure |
How much context needs to remain legible? |
|
ISO |
Sensor amplification / recorded brightness relationship |
Is the image underexposed because light is limited, or because position is poor? |
|
Exposure compensation / manual exposure |
Overall placement of tones |
What part of the scene must retain detail? |
|
White balance |
Overall colour interpretation |
Is the colour global, or are different surfaces creating mixed casts? |
|
Histogram / highlight alert |
Feedback on tonal distribution |
Does the clipping affect information that matters to the photograph? |
Why Better Gear Can Hide a Lighting Problem
Modern cameras are exceptionally good at recovering shadows, focusing in low light and producing clean files at high ISO. Those advances are useful. They can also make it easier to postpone the harder question: why was the subject placed in poor light in the first place?
A fast lens can blur a distracting background, but learning to move three steps can remove the distraction entirely. More dynamic range can recover a face in shade against a bright window, but changing the angle may create a more coherent photograph before post-production begins. A newer autofocus system can track a subject accurately, but it cannot choose the moment when the light, expression and background align.
When Expensive Gear Really Does Matter
The lesson is not “gear does not matter.” It is “gear should solve a problem you understand.” Equipment can be a genuine professional advantage when the visual requirement exceeds what the current tool can reliably deliver.
|
Real limitation |
What better equipment may add |
What it cannot replace |
|
Very low light |
Cleaner high-ISO files, better autofocus, stabilisation |
Finding direction, contrast and a meaningful moment |
|
Fast movement |
Faster readout, tracking, burst depth, lens AF speed |
Anticipating where the subject will move |
|
Extreme contrast |
Greater recoverable tonal range |
Choosing which tones should dominate the photograph |
|
Specific perspective |
Appropriate focal length, tilt-shift or specialist optics |
Understanding subject/background relationships |
|
Commercial output |
Higher resolution, tethering, reliability, system consistency |
Lighting judgement and art direction |
|
Harsh weather / long assignments |
Sealing, battery life, redundancy |
Preparation, observation and visual discipline |
|
FIELD NOTE Buy equipment when you can name the limitation in a sentence: “I am missing focus in very low light,” “I need more working distance,” “the client requires larger output,” or “I cannot control perspective with this lens.” That is very different from hoping a purchase will make the photographs feel better. |
The Natural Light Decision Framework
Use this sequence before changing settings. It is designed to make the visual decision happen first and the technical response second.
- Find the source: where is the dominant light coming from?
- Read the shadow: is the transition hard, soft, deep, open or mixed?
- Check the background: is it brighter or darker than the subject, and is that helping?
- Inspect colour: what surfaces are reflecting into the subject?
- Move the subject: can ten centimetres improve eye light, shadow shape or colour?
- Move the camera: can a new angle simplify the background or change the reflection?
- Decide what must survive: highlights, skin, atmosphere, movement, context or silhouette?
- Only now choose exposure, focal length and focus behaviour to record the decision.
Five Exercises That Teach More Than Shopping for Gear
Exercise 1 – One Window, One Subject, Five Positions
Photograph one person facing the window, at roughly 45 degrees, at 90 degrees, facing away from the window and fully backlit. Keep the lens and general framing similar. Compare the shadow shape, eye brightness, background relationship and emotional tone.
Exercise 2 – Follow One Wall for a Day
Choose an ordinary wall and photograph it in the morning, around midday, late afternoon and after direct sun has left it. The subject is not the wall. The subject is how direction, texture and colour change while the object remains the same.
Exercise 3 – Compare Three Kinds of Shade
Find shade beside greenery, beside neutral stone and beside a white wall. Photograph the same subject in each place. Do not correct colour until after comparing the files. Notice how much the environment contributes to the light.
Exercise 4 – Ten Metres, Ten Photographs
Stay within a ten-metre radius. Make ten distinct photographs using only changes in position, subject orientation, background and available light. The restriction prevents location hunting from becoming a substitute for seeing.
Exercise 5 – One Lens, No Shopping
Use one lens for an entire session. When the frame fails, solve it by moving. The exercise reveals how often “I need another lens” actually means “I have not explored the geometry of this scene.”
A One-Week Natural-Light Practice
|
Day |
Assignment |
What to review |
|
Day 1 — Direction |
Photograph the same face with front, side and backlight. |
Shadow placement and dimensionality |
|
Day 2 — Hard / soft |
Find three hard-light scenes and three soft-light scenes. |
Shadow edge and texture |
|
Day 3 — Window |
Work only beside one window. |
Falloff, angle and background brightness |
|
Day 4 — Shade |
Compare open shade in three environments. |
Colour casts and eye light |
|
Day 5 — Midday |
Shoot only when the light is difficult. |
Architecture, reflection and intentional shadow |
|
Day 6 — Golden hour |
Stay from bright low sun through post-sunset skylight. |
How the light changes minute by minute |
|
Day 7 — Edit |
Choose ten frames and explain the light in each. |
Whether you can describe the visual decision without mentioning gear |
Common Beginner Problems That Are Really Light Problems
|
What the photographer says |
What may actually be happening |
First thing to try |
|
“My portraits look flat.” |
The light is too frontal or the background is too similar in brightness. |
Rotate the subject, seek direction, or place them against a darker background. |
|
“Skin looks green.” |
The subject is receiving reflected light from foliage or coloured surfaces. |
Move toward neutral surroundings or change the angle to the open sky. |
|
“The sky is always white.” |
The subject is much darker than the background and exposure is prioritising the face. |
Change position, use brighter natural fill, or decide whether the sky truly needs detail. |
|
“Golden hour still looks ordinary.” |
The light is warm but the composition and direction are not intentional. |
Treat the sun as a directional source, not a filter. |
|
“Overcast photos are boring.” |
Soft light has become non-directional and the subject lacks separation. |
Use doorways, overhangs or darker backgrounds to create shape. |
|
“I need a faster lens.” |
The real issue may be insufficient light direction, poor positioning or an unnecessary shutter speed. |
Solve position and exposure logic before buying. |
Natural Light Quick Reference
|
Question |
Short answer |
|
BEST FIRST PRACTICE |
One large window, one subject, several angles. |
|
BEST WAY TO READ DIRECTION |
Look at the shadow before the highlight. |
|
HARD LIGHT |
Crisp shadow edges and stronger contrast; useful when designed intentionally. |
|
SOFT LIGHT |
Broad transitions and lower local contrast; still needs direction to create shape. |
|
OPEN SHADE |
Judge what sky and reflecting surfaces are visible to the subject. |
|
MIDDAY |
Use architecture, walls and shadow as lighting tools. |
|
GOLDEN HOUR |
A changing low-sun condition, not an automatic style. |
|
OVERCAST |
Soft but potentially flat; create direction with environment. |
|
GEAR PRIORITY |
Upgrade when you can identify a specific technical limitation. |
|
CORE HABIT |
Move subject → move camera → decide exposure → choose equipment. |
Frequently Asked Questions
Is natural light better than flash?
No. Natural light and flash are sources, not quality rankings. Either can be hard or soft, directional or flat, warm or cool. Natural light is excellent for learning because its changes force you to observe. Flash becomes powerful when you understand the qualities you are trying to create or control.
What is the best natural light for portraits?
There is no universal best light. Broad directional window light and open shade are forgiving starting points because they make facial transitions easier to study. Hard sun, backlight and overcast conditions can also produce exceptional portraits when the direction and background support the intent.
Why do my natural-light photos look flat?
The light may be too frontal, too even or too similar in brightness to the background. Look for direction. Rotate the subject, move closer to the edge of shade, use a darker background or place the subject near a window or doorway where part of the sky is blocked.
Should beginners buy a fast lens for natural-light photography?
A fast lens can help in lower light and can produce shallow depth of field, but it does not teach lighting. If the main problem is poor direction, colour contamination or weak background control, a wider aperture will not solve the visual issue.
How do I photograph in harsh midday sunlight?
Use the environment. Look for architectural shade, neutral reflective walls, darker backgrounds and intentional shadow patterns. If direct sun is unavoidable, position the subject so the light has a clear graphic purpose rather than trying to make it behave like soft evening light.
Why does shade sometimes make skin look green or blue?
Shade removes direct sun but not reflected light. Green foliage, blue sky, painted walls and coloured paving can all influence the subject. Move closer to a neutral reflector, change angle, or reduce the amount of coloured environment visible to the subject.
Is golden hour always the best time to photograph?
No. Golden hour can provide warm, low-angle light, but the usable result depends on weather, terrain, architecture, background and subject position. Some stories need the clarity of morning, the graphic force of midday, or the restraint of overcast light.
When should I finally invest in better gear?
When a specific limitation is repeatedly preventing the photograph you already know how to make: unreliable focus in low light, insufficient focal-length options, inadequate resolution for a client requirement, weather reliability, faster handling, or another clearly identified technical need.
The Photographer Should Notice the Light Before the Camera
Natural-light mastery does not mean refusing flash, owning minimal equipment or proving that expensive cameras are unnecessary. It means developing a sequence of attention in which the light is understood before the tool is chosen.
You enter the room and notice the window. You notice the bright wall opposite it. You see that the subject is standing too deep in the room. You move them forward. The eyes gain light. The background becomes darker. You rotate slightly and the cheek picks up shape. Only then do aperture, shutter speed, ISO, focal length and autofocus become relevant, because now the camera is recording an intentional lighting decision.
That is the point of learning natural light first. Not to avoid equipment, but to make equipment answer to judgement.
|
FINAL THOUGHT Better gear expands what you can do. Better light awareness changes what you notice. The second improvement usually matters first. |
Continue developing your photographic eye with Image Studio Academy, where we explore light, composition, visual storytelling and the creative decisions behind stronger images.
Continue with Learning to See Before Learning to Shoot developing your photographic eye with Image Studio Academy, where we explore light, composition, and visual storytelling through Image Studio.