

Learn how to create a cinematic music video through preproduction, camera and lens choices, lighting, movement, editing, color grading, sound design, VFX, storytelling, and AI hybrid workflows.
← Back to Editorial
← Back to Editorial
Three Production Moves That Give Music Video Creators a Cinematic Look
September 1, 2026
The cinematic music video look comes from three forces working together: visual consistency across every frame, camera and lighting choices that carry real character, and an edit locked to the song’s structure. None of it happens by accident. The first move is practical, not artistic: choose your production path (AI generation, phone or DIY, or a traditional crew) and lock a visual reference or short treatment before a single frame gets shot or generated.
TL;DR:
- AI-generated videos are ideal for abstract or surreal visuals on a tight budget, but they can lack visual consistency and performer presence.
- Traditional shoots provide reliable, high-quality footage with natural consistency, depth, and emotional authenticity, though at higher cost and longer scheduling time.
- Preproduction should focus on a clear, concise treatment and detailed song mapping to ensure visual coherence and emotional targeting throughout the video.
- Optimal lighting, lens choices, camera movement, and color grading create cinematic depth and mood, with simplicity often delivering the strongest visual impact.
- Combining practical, real footage with AI or stylized effects can produce more authentic and cohesive music videos than relying solely on generative tools.
Table of Contents
- Choosing the Right Path for a Cinematic Music Video Look
- Preproduction and Concept: Building the Treatment Before You Shoot
- Camera, Resolution, and Lens Choices That Build Image Character
- Lighting and Set Design That Create Cinematic Depth
- Camera Movement and Composition That Read as Cinematic
- Editing to the Music: Cutting for Rhythm and Momentum
- Color Grading and Finishing That Sell the Cinematic Illusion
- AI and Hybrid Workflows Without Losing Visual Consistency
- Studio Checklists That Keep a Shoot on Track
- How Sound Design Shapes the Cinematic Feel
- VFX and Compositing Beyond the Color Grade
- Storytelling Structures That Carry a Cinematic Music Video
- What Iconic Cinematic Music Videos Actually Teach You
- When Handcrafted Choices Beat Algorithmic Shortcuts
- Work With Image Studio on Your Next Cinematic Music Video
- Selected Sources and Further Reading
Choosing the Right Path for a Cinematic Music Video Look
Most creators waste weeks debating gear before they’ve answered the one question that actually decides the outcome: which production path matches the song’s budget and ambition? There are three real options, and each delivers a different kind of cinematic result.
AI-generated video now handles beat-synced abstraction and stylized morphs impressively well, and it costs a fraction of a shoot. Phone or DIY production gives you full control over performers and location at low cost, but it demands more skill to fake the lighting and lens character that expensive gear delivers automatically. Traditional crew production remains the most reliable route to consistent, high-fidelity footage, though it costs the most and takes the longest to schedule and execute.
The tradeoffs that matter most for a cinematic result:
- Visual consistency: AI tools can drift in face and lighting between generated clips; traditional shoots hold consistency naturally because the same camera, lens, and light rig stays in place.
- Performer presence: A real artist on camera, lip-syncing and reacting to music, reads as more emotionally authentic than a generated proxy in almost every case.
- Location authenticity: DIY and traditional shoots can use real texture (rain, dust, practical light sources) that AI tools still struggle to render convincingly.
- Speed and cost: AI and phone-based workflows move fastest and cheapest; traditional crews cost more but reduce the risk of unusable footage.
Here’s the practical checklist: if the song leans abstract or surreal, and the budget is tight, start with an AI-first or hybrid workflow. If the song depends on a performer’s face and emotional presence, prioritize even a small traditional crew over a fully generated approach. If you’re shooting solo on a phone, spend your limited resources on lighting and lens accessories rather than camera bodies, since light is what separates flat footage from something that reads as intentional.
Preproduction and Concept: Building the Treatment Before You Shoot
Cinematic cohesion is decided before the camera turns on. A strong treatment is two paragraphs, not twenty: one describing the mood, palette, and emotional arc of the video, and one describing the visual world (locations, wardrobe, key images) that will carry that mood. Skip this step and you’ll end up with technically competent footage that never quite feels like one thing.
Mapping the song’s structure to visuals is the part most beginners skip, and it’s the part that makes a chorus actually land. Follow this sequence:
- Transcribe the song’s sections (intro, verse, chorus, bridge, outro) with timestamps, so every shot decision ties back to a specific moment in the track.
- Assign a visual “panel” to each section describing camera energy, color temperature, and location, so the chorus visually escalates rather than repeating the verse’s look.
- Build a shot list keyed to those panels, noting lens, framing, and any wardrobe or prop change required to keep continuity across locations shot on different days.
- Storyboard the two or three shots that carry the emotional weight of the video (usually the chorus hook and the final image) in more detail than the rest, since those frames get watched and rewatched.
This structure matters because cinematic music videos succeed when image and sound codes reinforce each other rather than running in parallel. Color, composition, costume, and cutting all need to point toward the same emotional target the song is building toward. A treatment that names that target explicitly, in plain language, saves hours of second-guessing on set.
Camera, Resolution, and Lens Choices That Build Image Character
Shooting in 4K at a 4:3 open gate aspect ratio maximizes sensor usage, giving you room to reframe, stabilize, or crop for vertical delivery later without losing resolution. That flexibility matters most in the grading stage, when you discover a shot needs to be reframed to match a different one cut next to it.
Lens choice does more work than most creators expect:
- Prime lenses around f/2.1 give natural background separation and consistent character across a scene, since you’re not fighting a zoom’s variable optics.
- Vintage or anamorphic lenses add texture, distinctive flares, and a painterly quality that professionals often prefer over clinical sharpness, especially for night exteriors or moody performance shots.
- Macro extension tubes and close-focus prime work are worth carrying for texture B-roll. Sacrificing infinity focus to capture patina, fabric weave, or skin detail adds an editorial feel that wide establishing shots can’t provide.
- Frame rate choice should be locked before the shoot, not decided in the edit; shooting higher than your delivery rate gives you slow-motion options without artifacts.
Pro Tip: If you want dreamy slow-motion singing without breaking lip sync, speed the playback track somewhat during filming and shoot at a proportionally higher frame rate. Conform it back to normal speed in post and the performance stays perfectly synced while the footage plays in slow motion.
Lighting and Set Design That Create Cinematic Depth
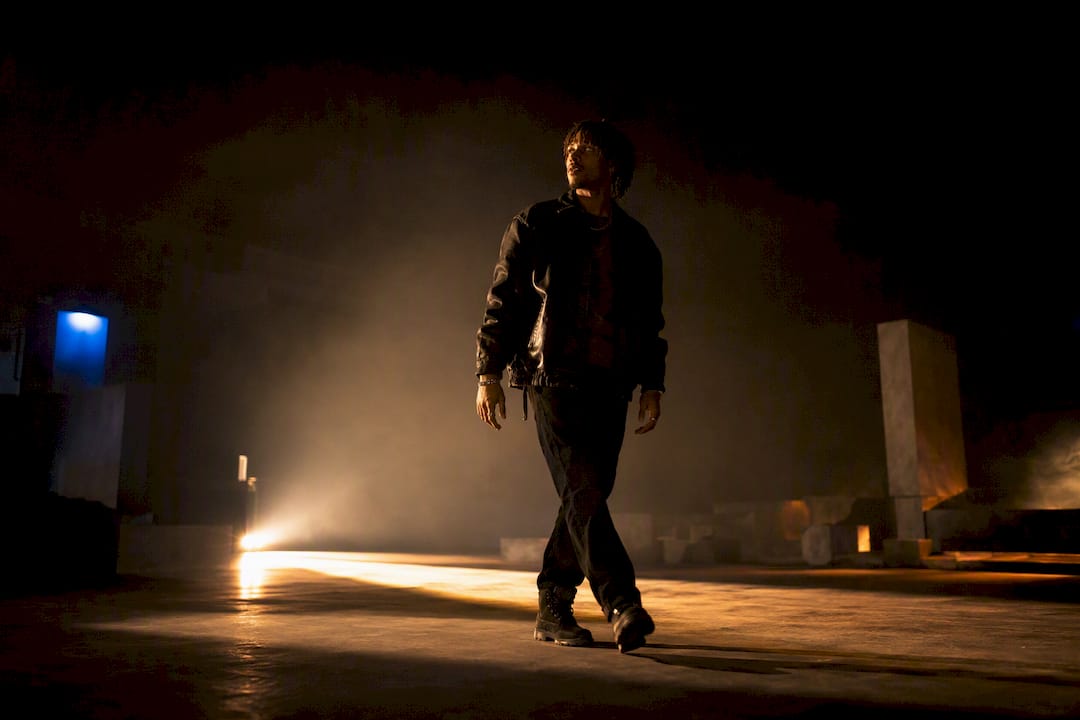
Flat, even lighting is the single fastest way to make expensive footage look cheap. Cinematic depth comes from motivated, directional light: a key source that makes narrative sense (a window, a practical lamp, a streetlight) combined with backlight to separate the subject from the background and a subtle eyelight to keep the performer’s eyes alive on camera.
A few lighting and design recipes that scale from single-operator shoots to full crews:
- Backlight plus fill, even a single LED panel bounced off a wall, creates instant separation between subject and background.
- Practicals in frame (lamps, neon, string lights) do double duty as set dressing and motivated light sources, which reads more naturally than an obviously rigged key light.
- Palette planning tied to the song’s emotional arc: cool desaturated tones for melancholy verses, warmer saturated tones for euphoric choruses, decided in preproduction so wardrobe and location choices support it rather than fight it.
- Smoke or haze, even from a cheap machine, gives light visible shape and adds atmosphere that flat rooms can’t fake in post.
- Single-operator tip: one strong key light and one bounce card will outperform three mismatched sources every time; simplicity reads as intentional.
Directing the song’s emotional shape into wardrobe, props, and palette during preproduction is what makes frames feel editorial and permanent instead of disposable, and it costs nothing but planning time.
Camera Movement and Composition That Read as Cinematic
Movement should follow the song’s energy, not the other way around. Verses tend to call for intimate, restrained camera work, slow drifts, static locked shots, handheld with minimal movement, while choruses can carry bigger, more deliberate motion: dolly moves, crane shots, or a whip pan that lands on the beat.
A few composition and blocking habits separate amateur footage from something that feels directed:
- Frame for scale and texture, not just faces; a wide shot that shows environment gives context that tight shots alone can’t.
- Use the rule of thirds deliberately for emotional beats, placing a performer off-center during vulnerable lyrics and centered during the chorus hook for visual emphasis.
- A slider or gimbal, even an inexpensive one, adds smooth motion that instantly reads as higher production value than static handheld footage.
- Block performers to move through the frame, not just stand in it. Movement across depth planes (foreground to background) suggests a bigger space and more coverage than you actually shot.
Editing to the Music: Cutting for Rhythm and Momentum
The edit is where a cinematic music video either comes together or falls apart, and the rule practitioners return to again and again is simple: snap your strongest cuts to the strongest beats, and save your best shot for the chorus. Verses can breathe with longer takes; choruses need momentum.
A workflow that keeps this manageable on a real timeline:
- Find the track’s tempo and place markers on every strong beat and structural transition (verse to chorus, chorus to bridge) before touching a single clip.
- Build the sequence in sections, cutting the chorus first since it’s the emotional peak and everything else should build toward or away from it.
- Use compound clips for repeated visual motifs (a recurring shot of the artist, a location establishing shot) so you can adjust timing globally without re-editing each instance.
- Match cut length to song section energy: longer holds in verses, faster cuts in choruses and drops, and match the cut rate to how the drums or vocal delivery actually move.
- Audio-reactive parameters, even simple keyframed zoom or shake tied to bass hits, add polish that a straight cut sequence lacks.
Editors who treat the timeline as a section-driven structure, rather than a chronological assembly of footage, consistently produce videos that feel like part of the song instead of visuals playing alongside it.
Color Grading and Finishing That Sell the Cinematic Illusion
Grading is where a technically clean video either becomes cinematic or stays looking like raw footage with a filter on it. The order matters more than the tools: fix luminance before you touch hue. Get the tonal relationships (shadows, midtones, highlights) correct first, because shifting color on an unbalanced image just amplifies the imbalance.
Once luminance is locked, build from there:
- Apply film emulation and grain tastefully, as a finishing layer rather than a crutch to hide exposure or lighting problems.
- Use selective desaturation to draw focus toward skin tones or a key wardrobe color while letting backgrounds recede.
- Add a subtle vignette and contrast roll-off in the shadows to mimic the falloff of real film stock rather than the harsh clip of digital sensors.
- Export separately for each format: 16:9 for platforms that support widescreen, 9:16 for short-form vertical, since a single crop rarely serves both compositions well.
- Check your grade on multiple screens, phone and monitor both, since colors that read correctly on a calibrated display can look flat or oversaturated on the device most viewers will actually use.
A studio-tested grading breakdown with visual examples is worth reviewing before your first pass, and the color grading examples for cinematic video collection is a useful reference for palette decisions specific to music videos.
AI and Hybrid Workflows Without Losing Visual Consistency
Generative tools have earned a real place in music video production, but only when matched to the right job. Audio-reactive tools work best for beat-synced abstract visuals. Photoreal generation tools produce the most convincing individual clips but require manual assembly to cut together smoothly. Painterly, stylized tools suit morphing, dreamlike sequences better than anything trying to look like straight footage.
A hybrid recipe that keeps consistency intact:
- Storyboard panels first, exactly as you would for a traditional shoot, so generated clips have a clear visual target instead of open-ended prompting.
- Generate anchor images for key moments, then use those as reference assets across every subsequent generation to prevent face and lighting drift between clips.
- Film complementary plates (performer close-ups, texture B-roll) traditionally, and blend them with generated footage rather than relying on AI for everything.
- Finish everything in one grading pass in a tool like DaVinci Resolve, since a unified grade is what disguises the seams between generated and filmed footage.
Face drift and inconsistent lighting are the two failure modes that give away a hybrid video fastest. Locking reference assets before generation, and correcting drift in the grade rather than trying to fix it shot by shot, prevents most of the damage.
Studio Checklists That Keep a Shoot on Track
Professional workflows succeed or fail on preparation most viewers never see. Image Studio’s preproduction process runs through the same checklist on every project, regardless of budget:
- References locked: mood board, color palette, and two or three key reference frames approved before call sheets go out.
- Wardrobe and camera tests completed at least one day before the shoot, not the morning of.
- LUT plan established so everyone on set, from the director of photography to the artist, is looking at a consistent preview of the final look.
- Safety and timing buffers built into the schedule, since cinematic shots (golden hour exteriors, complex blocking) take longer than they look like they should.
On set, monitors display a graded LUT preview while the camera records clean, flat log footage, giving the colorist maximum flexibility later without anyone on set guessing what the final image will look like. Post handoff should include the LUT reference, original camera files, and editorial notes on which takes carry the performance the director wants protected. Skipping that handoff step is the single most common reason footage that looked great on set disappoints in the grade.
How Sound Design Shapes the Cinematic Feel
Color and composition get most of the attention in conversations about cinematic music videos, but sound design, separate from the song itself, does real work too. Subtle ambient layers (room tone, environmental noise, a distant crowd) under dialogue-free moments give a video a sense of physical space that pure music can’t provide alone.
Foley-style detail, footsteps, fabric movement, a door closing, added under key visual beats gives the video a tactile realism that pulls viewers deeper into the scene rather than letting it feel like a music-only backdrop. This matters most during narrative sequences or transitions where the song drops out or goes instrumental; silence or near-silence is exactly when small sound details become noticeable and effective.
Transitions between sections also benefit from sound treatment: a reverb tail on the last note of a verse, or a subtle riser building into the chorus, reinforces the visual escalation you built into your shot list. The two systems, image and audio, are working toward the same emotional target, and a video that treats sound design as an afterthought usually feels thinner than one that doesn’t, even when the visuals are identical.
VFX and Compositing Beyond the Color Grade
A grade can only do so much. Cinematic music videos frequently lean on compositing and light visual effects to create moments that would be impossible or impractical to capture in camera: a double exposure of the artist overlaid on a landscape, a practical light source enhanced with a glow pass, or a simple environmental effect like rain or dust added in post to unify shots captured on different days.
Compositing also solves continuity problems that come up constantly in real production. If a wardrobe detail doesn’t match between two takes, or a background element needs to be removed or replaced, a clean composite fixes it far more convincingly than a reshoot budget usually allows. Green screen work, when it’s used, works best in music videos when blended with practical foreground elements (real smoke, real practical lights) rather than relying entirely on a digital environment, since fully synthetic backgrounds tend to read as flat next to a performer’s real skin and lighting.
The restraint matters as much as the technique. Visual effects that call attention to themselves pull focus from the performance and the song. The most effective use of VFX in a cinematic music video is usually invisible: a sky replacement that just looks like better weather, a subtle speed ramp that smooths a transition, a light wrap that makes a composite edge disappear into the background it’s sitting on.
Storytelling Structures That Carry a Cinematic Music Video
Not every cinematic music video needs a plot, but the ones that resonate longest almost always have a structure, even a loose one. Three approaches show up repeatedly across the strongest work in the genre.
Linear narrative follows a character through a beginning, middle, and end that roughly tracks the song’s own emotional arc, often ending on an image that recontextualizes the opening shot. Impressionistic or non-linear structure abandons plot entirely in favor of recurring visual motifs, a color, a gesture, a location revisited that build meaning through repetition rather than causality. Performance-driven structure keeps the focus on the artist but stages that performance in a way that escalates visually alongside the song, using location changes, wardrobe shifts, or lighting transformation to mark the song’s structural sections instead of a plot.
Whichever structure you choose, the strongest cinematic music videos tend to end on a single, deliberate image rather than fading out on more of the same. That final frame is often the one shot audiences remember and share, which is exactly why it belongs on the shot list from the earliest treatment draft, not decided on the fly during the edit.
What Iconic Cinematic Music Videos Actually Teach You
Studying reference videos works only if you’re breaking down decisions, not just admiring results. A few recurring patterns show up across widely cited cinematic music videos worth examining shot by shot.
Videos built around a single striking location tend to outperform ones that hop between five different settings, because the repeated environment lets small changes (lighting shift, wardrobe change, camera movement escalation) carry more visual weight. Videos that commit fully to one visual conceit, a single lens choice, a consistent color temperature, one dominant camera movement style, read as more intentional than ones that showcase range for its own sake. And videos that sync a specific visual moment precisely to a specific musical moment, a cut landing exactly on a snare hit, a color shift landing on a key change, create the sense of inevitability that separates a cinematic video from a well-shot one.
The practical lesson isn’t to copy any specific reference frame by frame. It’s to identify the one or two decisions that make a video you admire feel cohesive, then apply that same discipline (one location, one lens character, one grading language) to your own project rather than trying to include every technique this article covers in a single video.
When Handcrafted Choices Beat Algorithmic Shortcuts
Tactile, handmade production choices create permanence that generative shortcuts still struggle to match. A texture shot from a macro lens, a real light source flickering in frame, a performer’s actual reaction to a real environment: these carry a kind of visual weight that’s hard to fake, and it’s why the strongest cinematic music videos increasingly blend both worlds rather than picking one.
AI earns its place when the goal is stylized abstraction or when budget makes a full crew impossible. A crew earns its place when authenticity, a real face, real light, real space, is the point of the video. The mistake is treating either as a universal answer.
One planning note worth taking seriously: think ahead about usage rights and format needs before you shoot or generate anything, since reworking a video for a new aspect ratio or platform months later is far cheaper when the original footage and assets were captured with that flexibility in mind.
— Image Studio
Work With Image Studio on Your Next Cinematic Music Video
Reading through every technique above is one path. Handing the project to a team that has already run this exact workflow, treatment, song-mapping, lens selection, grading, hybrid AI integration, on over 250 completed projects is another. Image Studio has spent more than 14 years building the specific muscle this article describes: matching camera and lighting choices to a song’s emotional arc, then finishing in a grade that holds up across delivery formats.
Our music video production work has generated over 150 million combined views for artists and brands, with color-grading and AI-hybrid integration built into the same workflow rather than bolted on afterward. Most music video projects move from treatment to delivery within a few weeks, depending on scope and location needs.
If you have a track that needs a visual identity that matches its ambition, start with a project quote for film production and describe the song, budget, and timeline. We’ll tell you honestly which production path fits.
Selected Sources and Further Reading
A few resources worth reviewing alongside this guide:
- PetaPixel’s music video production walkthrough — covers open-gate 4K shooting, lens selection, and the slow-motion lip-sync technique in practical detail.
- Image Studio’s own grading and workflow notes, including music video color grading breakdowns and cinematic effects techniques, expand on the on-set and post practices summarized here.
- Babylovegrowth’s guide on visual storytelling examines how brands and creators align image codes with broader storytelling goals, a useful companion to the song-and-image alignment principles covered in this article.
